Using Midivex with your DAW
In this example, we walk it through using Logic Pro.
What You Need
Midivex can run inside your DAW workflow, not as a plugin but by connecting a route.
You connect your keyboard (or any MIDI input device) into Midivex via a virtual MIDI port, then set that same port as a MIDI input in your DAW.
That way Midivex sits between your keyboard and your DAW, so MIDI effects, clock sync, patch recall, and every other Midivex feature are available as you play and record.
Step 1
Create a Route to a Virtual Port
In the Route view, create a route between your keyboard (or MIDI input device) and a virtual MIDI port. Midivex on Mac includes its own virtual port called Midivex Virtual, and most DAWs (including Logic Pro) also spin up a virtual port that Midivex can use.
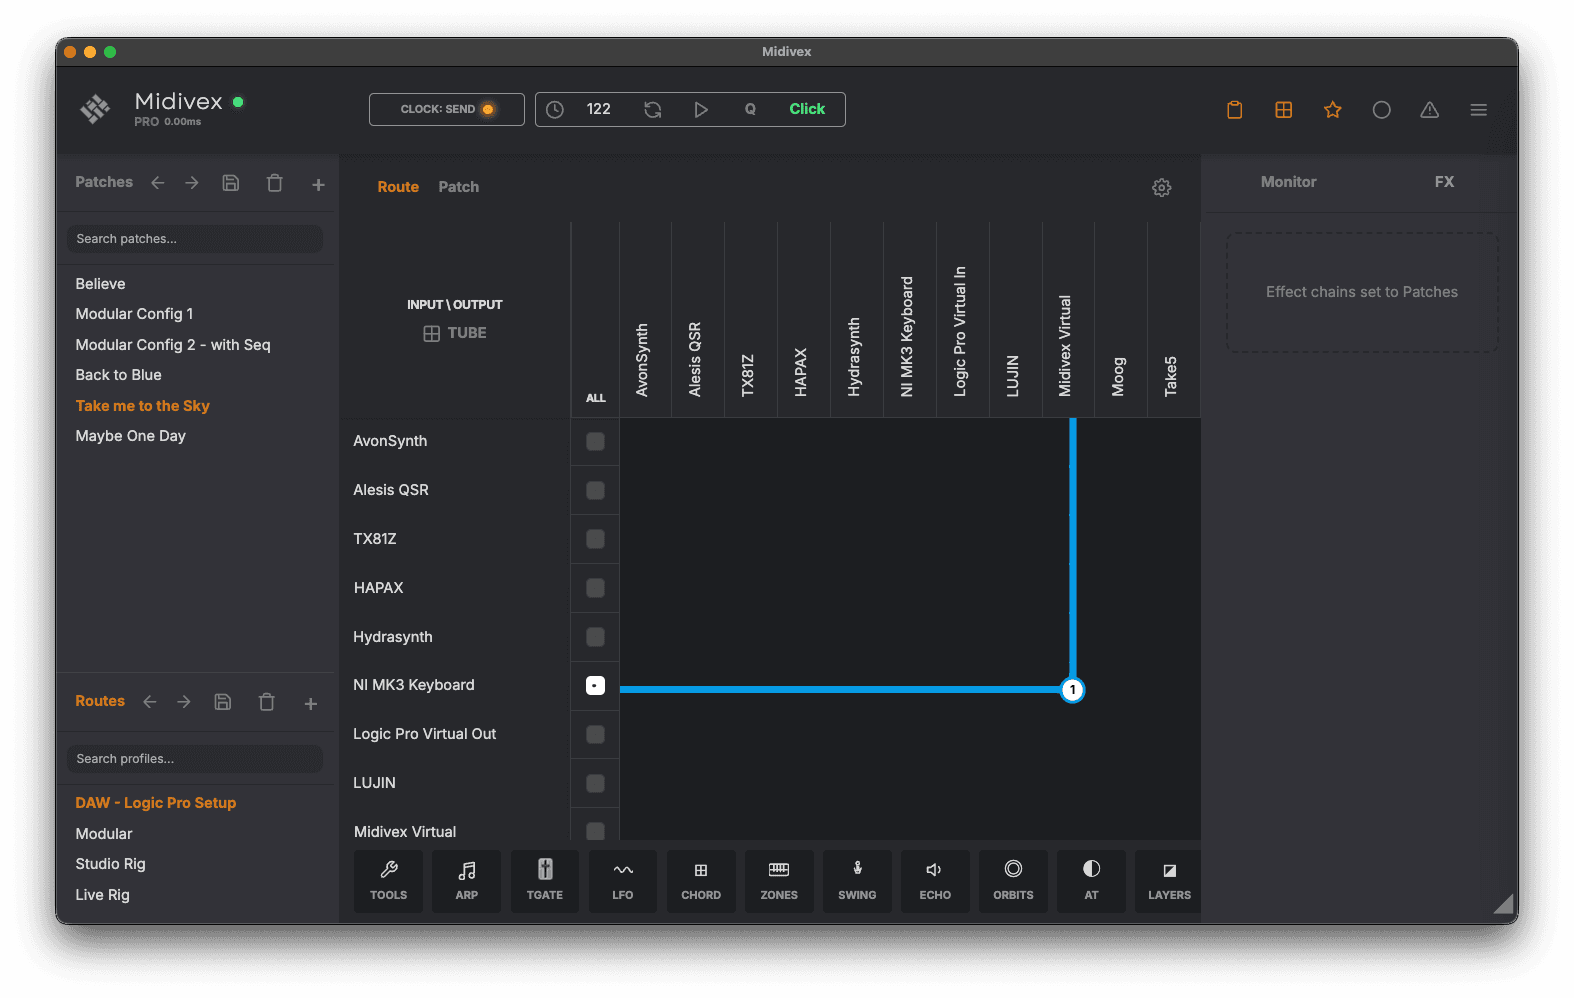
Route your keyboard to a virtual port in Midivex
Step 2
Set the Virtual Port as Your DAW’s Input
In your DAW, make sure your keyboard is not an active MIDI input, and instead enable the virtual port as the incoming MIDI device. That way your keyboard passes through Midivex on its way to the DAW, so every note is processed by the Midivex effect chain first.
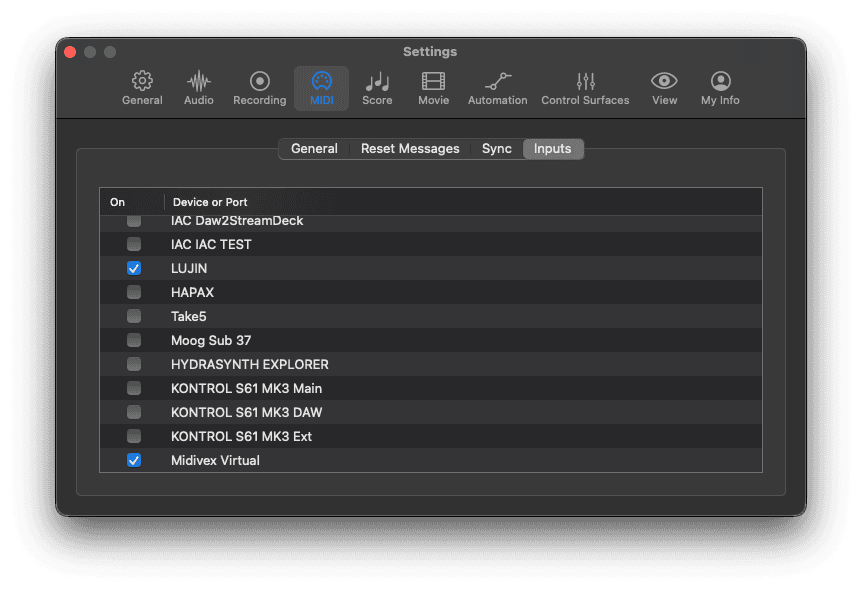
Logic Pro MIDI Inputs — enable the virtual port, disable the keyboard's direct port
Step 3
Add Effects in Patch View
Switch to the Patch view in Midivex and add effects to the device. As you play or record in your DAW, you will hear the effects apply in real time.
Most effects write their individual notes out when recorded. For example, an Arp records the arpeggiated notes rather than the chord you held down, which is handy for editing the part in your DAW afterwards.

Add effects in Patch view and hear them as you play or record
Going Further
There are plenty of advanced routing options on top of this. You can run multiple virtual ports on different channels and route them to different DAW tracks, or send clock and program changes into Midivex from your DAW to switch patches on the fly during playback.
Clock Sync (Logic as Leader)
To sync Midivex effects (arpeggiator, trancegate, etc.) to Logic’s tempo:
Open Logic's sync settings
Go to Settings → Synchronization → MIDI tab.
Send clock to Midivex
Set a Destination to Midivex Virtual and tick the Clock checkbox.
Set Midivex to Receive
In Midivex, switch to Clock: Receive.
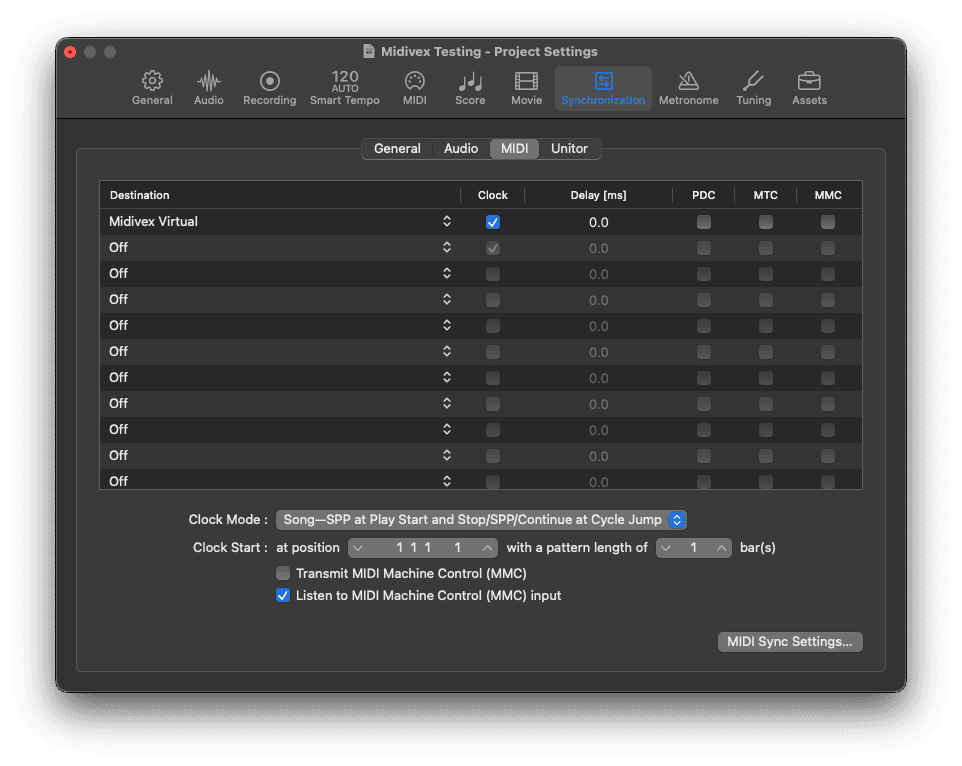
Logic Pro Synchronization settings — Midivex Virtual set as clock destination
When you press play in Logic, Midivex will follow Logic’s tempo and transport. All clock-synced effects will lock to the session BPM.